Εξαιτίας των σχισιμάτων, των οπών και της οξείδωσης του αυθεντικού υφασμάτινου υποστηρίγματος του έργου του Μίλλερ αποφασίστηκε, για την ενίσχυση της μηχανικής του αντοχής, να συγκολληθεί σε νέο ύφασμα.
Preparing the back side for framing
The work was carefully cleaned (the painting surface and the back side, from any deposits, debris and dust, using a special vacuum cleaner) in order for the conservators to proceed with the preparation of the work for framing. After the tests that had been carried out to select the appropriate adhesive material, the first layer of thermoplastic adhesive was applied to the back side of the project, in a ratio of 1 part BEVA 371 – 3 parts white spirit (solvent). After 24 hours the second layer of thermoplastic adhesive was applied in a ratio of 1 part BEVA 371 – 2 parts white spirit (solvent). The third layer was applied in a ratio of 8 parts BEVA 371 – 1 part White spirit.
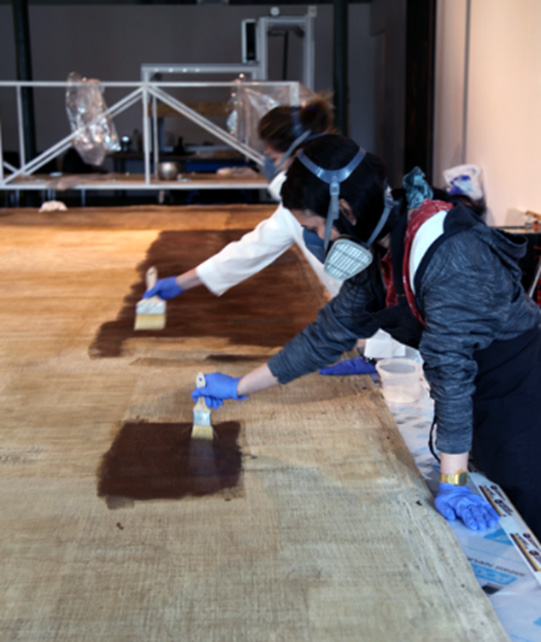
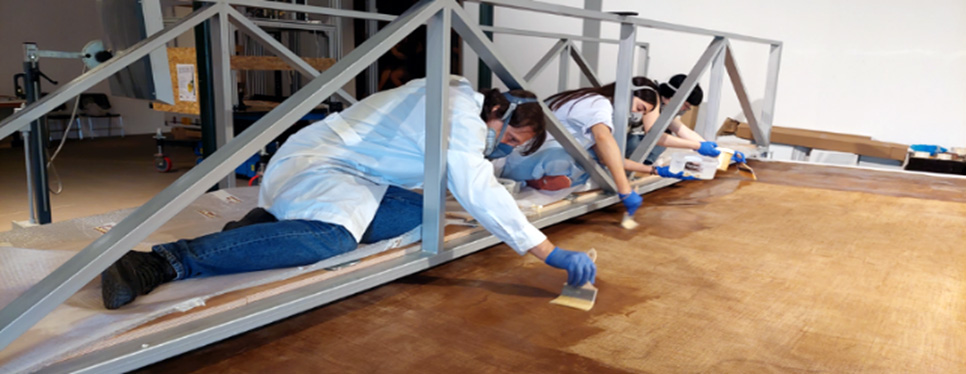
The preparation of the elastic thermoplastic adhesive, BEVA 371 and its dilution with white spirit, weighing and heating, were carried out in the gas extractor available in the maintenance laboratory of EPMAS. The adhesive was applied to the backside of the project using brushes (Figure 1). During the preparation and deposition of the adhesive material on the back side of the project, the maintenance workers took all necessary safety measures for their safety, e.g. masks, gloves, etc. They also used the special bridge constructed so that they could access the central points of the panel.
Finally, after the adhesive material had dried and stabilized, a final layer of adhesive material, a layer of BEVA film, was applied to the back side of the project (Figure 2).
Preparation of the new fabric
Miller’s “March 30, 1814” in 1855 was worked on a single fabric. Stamps of the fabric manufacturer are on the reverse side of the work. Nowadays, single fabrics of such large dimensions are no longer made. For this reason, a suitable fabric was first selected for the framing of the work that was compatible with the original fabric and capable of being able to provide the necessary reinforcement to the work, combined with the appropriate adhesive material, after framing. The fabric chosen was a medium-weight linen, glueless, 224 cm wide, code L510 from Kremer. In order to be able to cover the entire surface of Muller’s work (440 cm high) and with the margins required to fix the work to the special frame (an additional 40 cm of fabric on each side), three strips of the new fabric had to be sewn together, i.e. two horizontal seams had to be made. Seam tests were carried out in order to select the appropriate type of seam which would provide high strength and at the same time would not be imprinted on the painted surface of the work during lining and pressure application, along with the application of temperature to activate the adhesive material and bond the two fabrics.
After being sewn and flattened, the new fabric was placed on the back of the project over the BEVA 371 film.
Creating a “folder”
Modifications were made to the special work table – workbench built for the maintenance of Miller’s work.
A single fabric used for posters was placed on the wooden surface of the table – bench. This fabric provided a single surface without joints, and during the high temperature resistance tests, it proved to be durable enough to be used for the lining process. The entire surface was covered by polyester sheets with a silicone coating.
The project, with the back side prepared, was placed face down. The new fabric was placed on top of it, the edges (the excess fabric) were carefully fixed and folded, and then sheets of special non-stick and thermoformed polyester (Melllinex) were carefully placed. The sheets were glued together with adhesive tapes to keep them stable and to prevent air from entering. The aim was to create an airtight “envelope” in which, on activation of the vacuum-absorption pumps, a vacuum would be created.
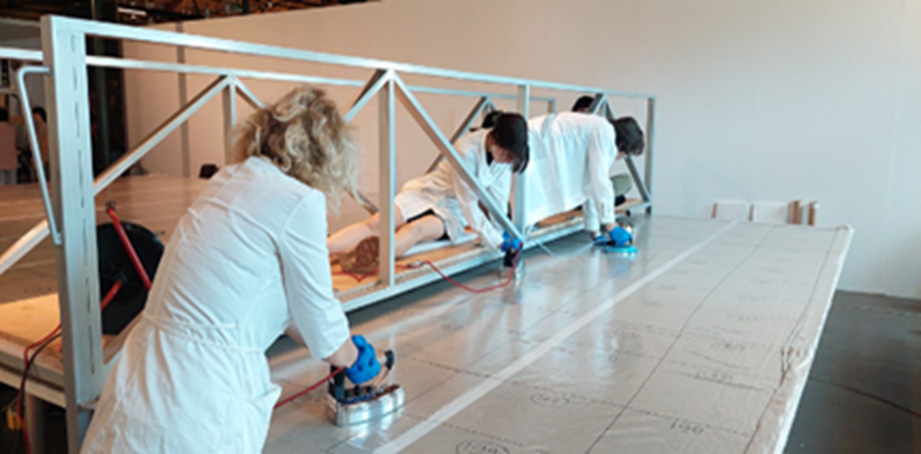
Framing – Welding by applying temperature and pressure
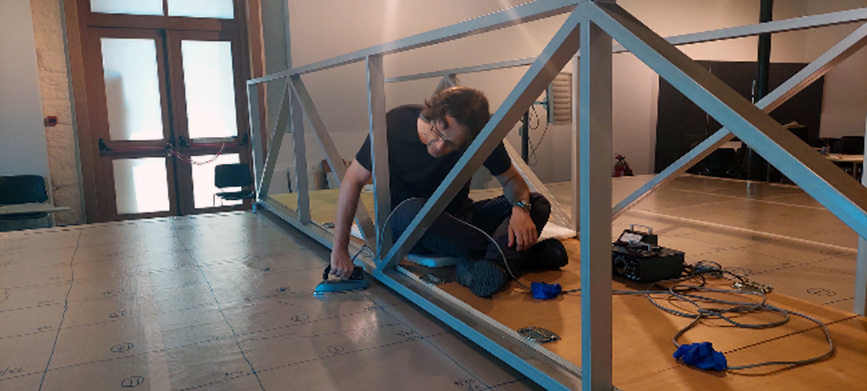
The framing – total reinforcement of the project – was carried out by applying temperature from the back side of the project using special framing irons.
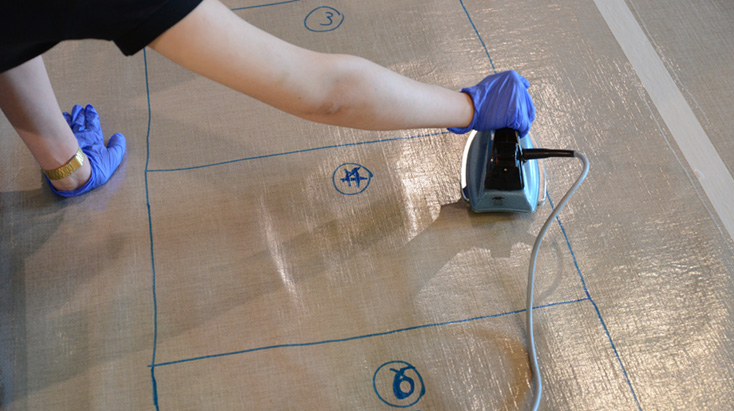
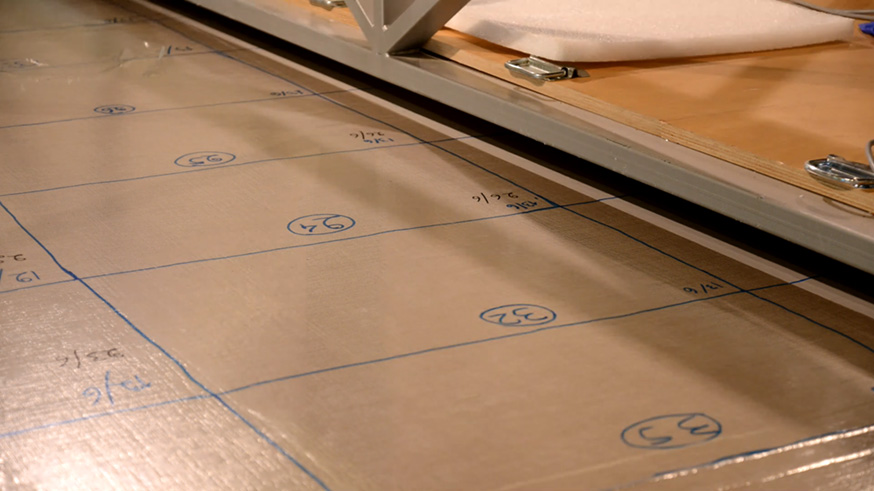
First the vacuum pumps were activated and then, with the help of the improvised ‘vacuum envelope’, continuous pressure was applied to the two surfaces to be welded – that of the original canvas of the work and that of the lining fabric. The surface was divided into rectangles (in the form of a cannonball) in order to make it easy to check the areas where temperature has been applied (Figure 3). Starting from the centre of the project, on the bridge, the maintenance workers applied temperature using the electric irons until they completed the total lining by reaching the edges of the project. Figures 4, 5, 6.